Generate Your First Image in ComfyUI
Run a minimal ComfyUI text-to-image workflow: choose a checkpoint, write a prompt, set safe image size, click Queue Prompt, and confirm the Save Image result.
Quick answer
The first goal is not to make a perfect image. The first goal is to prove that ComfyUI can load a checkpoint, encode a prompt, sample a latent image, decode it with VAE, and save the result.
Recommended workflow
- 01
Use a minimal text-to-image workflow: The first goal is not to make a perfect image. The first goal is to prove that ComfyUI can load a checkpoint, encode a prompt, sample a latent image, decode it with VAE, and save the result.
- 02
Read Queue Prompt as a system test: When you click Queue Prompt, watch both the browser and the terminal. A browser progress bar without a terminal error usually means the workflow is running. A sudden traceback in the terminal means you should stop changing prompts and fix the environment, model, or node problem first.
- 03
Only improve quality after Save Image works: After the first output appears, save the workflow as your baseline. Then improve one thing at a time: prompt detail, sampler, steps, image size, LoRA, or upscale.
Full tutorial notes
Use a minimal text-to-image workflow
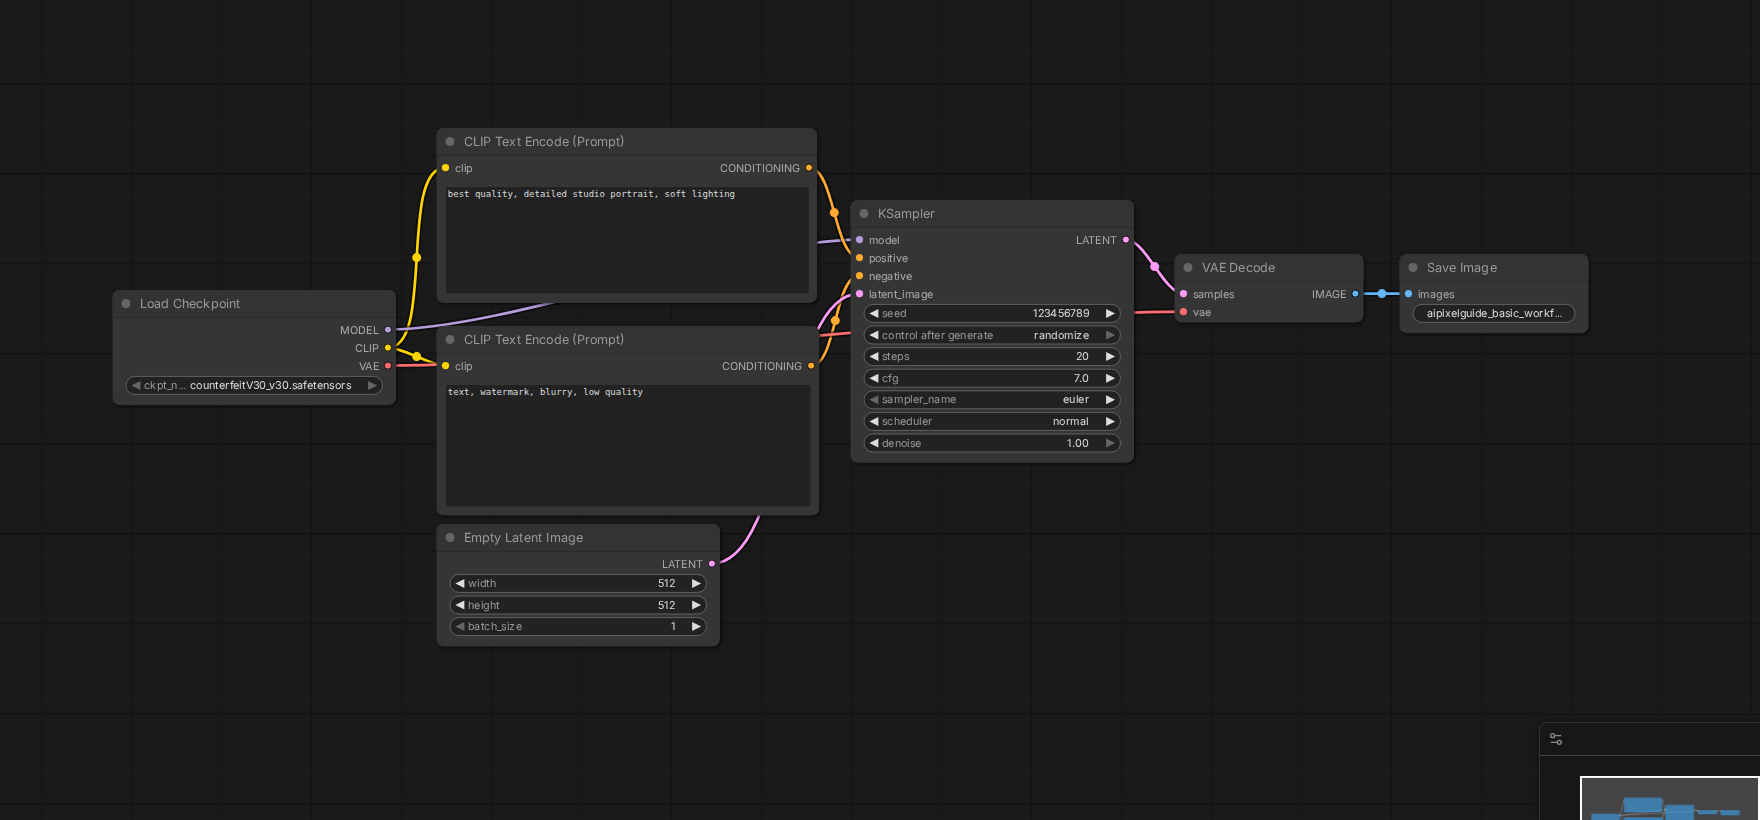
The first goal is not to make a perfect image. The first goal is to prove that ComfyUI can load a checkpoint, encode a prompt, sample a latent image, decode it with VAE, and save the result.
Start with a small size such as 512x512 or 768x768 depending on your model and GPU. Use batch size 1. Avoid ControlNet, upscale, video, face restoration, and multiple LoRAs until the simple chain works.
- Checkpoint Loader has a real model selected.
- Positive and negative prompt nodes contain readable text.
- KSampler uses moderate steps, not extreme quality settings.
- Save Image is connected at the end of the workflow.
Read Queue Prompt as a system test
When you click Queue Prompt, watch both the browser and the terminal. A browser progress bar without a terminal error usually means the workflow is running. A sudden traceback in the terminal means you should stop changing prompts and fix the environment, model, or node problem first.
If nothing happens, refresh the browser, check whether the server is still running, and confirm that the workflow has no red missing-node blocks or empty model dropdowns.
Only improve quality after Save Image works
After the first output appears, save the workflow as your baseline. Then improve one thing at a time: prompt detail, sampler, steps, image size, LoRA, or upscale.
This baseline gives you a recovery point. If an advanced workflow breaks later, you can return to the simple workflow and confirm that ComfyUI itself is still healthy.
Check before you run
- Select one real checkpoint in the Checkpoint Loader before touching prompt quality.
- Use batch size 1 and a small image size for the first run.
- Confirm the Save Image node is connected so there is a visible output to verify.
Common mistakes
- Trying to fix image quality before proving the workflow can finish once.
- Leaving a model dropdown empty and then changing sampler settings instead.
- Closing the terminal before checking whether Queue Prompt produced a traceback.
Success standard
- A Save Image node writes one image to the output folder.
- Queue Prompt finishes without a terminal traceback.
- The same simple workflow runs again after a restart.
What to do next
- Save this minimal workflow as your known-good baseline.
- Increase resolution or sampler steps one change at a time.
- Add LoRA, ControlNet, or upscale only after the baseline remains stable.
Finished this guide? Return to the main path
If this guide solved a specific issue, return to the beginner setup, model path, CUDA VRAM, or workflow import route to keep going.
Need more context?
This English guide gives the direct working path first. The paired Chinese reference can provide extra screenshots, local download notes, and longer troubleshooting branches for the same topic.